

Capturing the best photos on the Mera Peak climb requires far more than a high-quality camera. The dynamic Himalayan light, unpredictable mountain weather, and physically demanding ascent all influence how a photographer approaches each shot. Understanding how to prepare your gear, manage extreme cold, position yourself strategically, plan for changing light, and use high-altitude landscapes to your advantage is essential for bringing home images that truly represent the grandeur of this climb. This guide provides a deep, structured walkthrough of everything you need to create powerful, crisp, and emotionally compelling images from Mera Peak.
Prepare All Essential Photography Gear Before Starting the Trek
Securing the right gear from the start ensures you can shoot comfortably in high-altitude conditions. You need equipment that can withstand cold temperatures, variable lighting, and long trekking days. The right preparation avoids unexpected failures and keeps you focused on the creative process rather than technical difficulties.
Carrying two cameras or at least interchangeable lenses gives you flexibility when composing shots at different distances and angles. Batteries, memory cards, lens cloths, protective filters, and lightweight support equipment should all be gathered early. Weatherproofing is extremely important because the snowy terrain and thin air can quickly damage sensitive tools if they are left exposed.
Understanding how temperature affects each piece of equipment prevents frustrating interruptions on the trail. Cold air drains batteries faster, while humidity inside teahouses can cause condensation. Preparing solutions in advance keeps your camera functioning and ensures that every moment of the climb can be captured confidently.
Choose the Right Camera Body
Selecting a camera capable of handling extreme weather makes a major difference in image quality. A weather-sealed mirrorless or DSLR body with strong battery life and high dynamic range will help handle bright snow and deep shadows. Durability matters because the altitude environment pushes all systems to their limit.
Select Lenses for Mountain Landscapes
Wide-angle lenses provide expansive views of the Himalayan peaks, while telephoto lenses help frame distant ridges, ice formations, and climbers. Having both allows you to adapt your composition to varying terrain as you ascend from forested trails to glacial plateaus.
Organize All Power and Storage Systems for High-Altitude Use
Proper battery and memory management ensures you never miss a moment due to power loss or insufficient space. Mera Peak’s cold temperatures can reduce battery capacity dramatically, so preparing carefully prevents technical breakdowns during critical photo opportunities.
Carrying multiple fully charged batteries and storing them close to your body prevents rapid draining. High-capacity, high-speed memory cards allow you to shoot continuously in RAW format for maximum detail. Keeping cards organized prevents accidental overwrites and protects the integrity of your footage throughout the trek.
Power planning also includes evaluating the charging options available in remote lodges. Not all teahouses provide sufficient energy sources, and charging often comes at an additional cost. Knowing your limits helps you pace your shooting sessions and maintain enough power until the next lodge.
Protect Batteries from Cold Temperatures
Storing spare batteries inside inner jacket pockets or insulated pouches keeps them warm and preserves charge levels. Switching batteries frequently helps maintain consistent performance and reduces the risk of a sudden power loss during a key moment.
Manage Memory Cards with a Clear System
Labeling and organizing memory cards helps keep your files safe. Use protective cases to keep dust, snow, and moisture away, especially near glacier camps where wind can blow debris into card slots.
Position Yourself Intentionally to Maximize Composition Opportunities
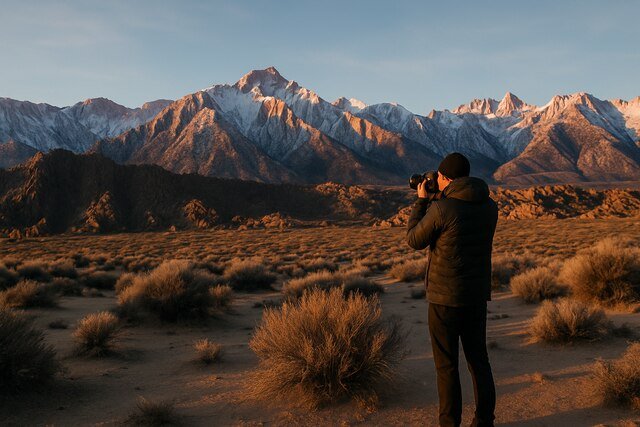
Choosing the right physical position on the trail elevates even simple shots into powerful images. Mera Peak offers dramatic landscapes, but without careful positioning many photos can appear flat or lack meaningful depth.
Moving slightly higher or lower, stepping a few meters to either side, or using a foreground object can dramatically improve the composition. Planning where to stand as you observe changing scenery ensures every image has a strong structure and emotional connection.
Understanding how trekkers and guides move allows you to anticipate ideal angles for action shots, especially on ridges and rope sections. Taking a moment to scan your surroundings before shooting helps you make the most of the natural layers of mountains, valleys, and sky.
Use Foreground Elements to Add Depth
Snow ridges, prayer flags, rocks, or trekking poles can lead the viewer’s eye into the frame. Including foreground detail gives the image a three-dimensional feel that fits the expansive nature of the Himalayas.
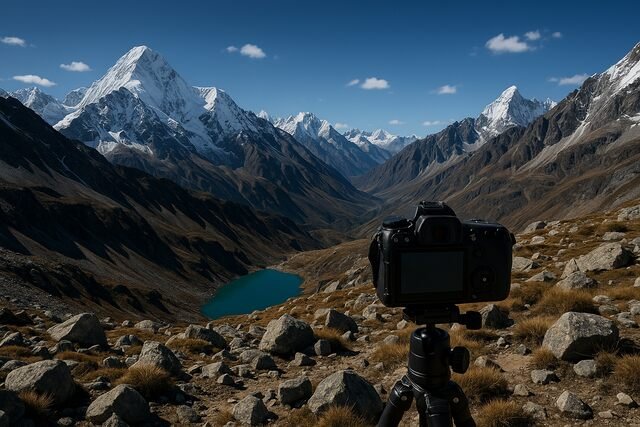
Position Yourself for Layered Mountain Shots
Aligning yourself so multiple peaks overlap creates a dramatic, textured backdrop. Moving along the trail to match the layers properly transforms a standard landscape into a dynamic representation of the region’s scale.
Adapt to Changing Weather and Light Conditions Throughout the Climb
Light is one of the most powerful creative tools on Mera Peak. The altitude, snow reflectivity, and rapid weather shifts make light both challenging and rewarding. Knowing how to adapt ensures your images remain clear and balanced.
Monitoring the sky helps you predict when clouds will soften harsh sunlight or when clear breaks will highlight distant peaks. Early mornings and late afternoons provide excellent color, while mid-day light requires careful exposure adjustments to avoid blown-out highlights.
Weather conditions affect color tone, contrast, and shadows. Snowstorms create diffused light, while clear skies intensify contrast. Recognizing these patterns allows you to use natural conditions to strengthen your images instead of fighting against them.
Adjust Exposure to Handle Bright Snow
Snow can easily trick camera meters. Using manual controls or exposure compensation ensures snow remains bright without losing texture. Shooting in RAW format provides flexibility when recovering details later.
Use Cloud Cover to Enhance Contrast
Soft, thin clouds reduce harsh shadows and help balance the scene. Heavy clouds create moody, dramatic atmospheres that add character to ridgelines and glacier sections.
Capture Action and Movement During Key Climbing Moments
Photographing people adds narrative power to your Mera Peak images. Action shots show the journey, challenge, and human element of high-altitude climbing. Timing and anticipation are critical for capturing natural, realistic moments.
Watching how the group moves lets you predict when climbers will pause, take steps, or interact with guides. Shooting burst mode increases your chances of freezing dynamic movements or catching expressive postures.
Movement photography on snow requires particular attention to contrast and clarity. Positioning yourself where the sun enhances the outlines of climbers or where shadows create dramatic shapes transforms a simple trekking shot into a storytelling frame.
Use Burst Mode to Capture Smooth Motion
Burst mode allows you to select the best frame from a sequence. This is helpful when climbers cross crevasses, use ropes, or lift their feet through deep snow.
Photograph Climbers Against the Landscape
Placing climbers in a wide frame emphasizes scale. The human figure becomes a point of reference, showing the vastness of the glacial route leading toward the summit.
Optimize Your Camera Settings for High-Altitude Environments
The thin air, bright snow, and shifting conditions require precise camera settings. Knowing how to adjust ISO, shutter speed, and aperture quickly ensures consistent quality in every environment along the ascent.
Higher ISO settings may be necessary during early morning or cloudy moments, while bright daylight often requires a lower ISO to prevent noise and preserve crisp details. Fast shutter speeds freeze motion on windy ridges, whereas slower speeds can capture atmospheric scenes like moving clouds.
Balancing aperture adds depth and texture to your images. Wide apertures highlight a subject against a blurred background, while narrow apertures provide sharpness from foreground to horizon. Understanding these relationships gives you full control over your creative output.
Set ISO According to Light Levels
Adjusting ISO helps maintain exposure without sacrificing clarity. Aim for the lowest ISO possible, increasing only when necessary to preserve shutter speed.
Control Shutter Speed for Stability
Fast shutter speeds work well in windy conditions where snow and fabric move quickly. Slower speeds can enhance dramatic cloud patterns or create silky effects on small streams during lower portions of the trek.
Plan Every Summit-Day Photo Opportunity Before the Final Push
Summit day on Mera Peak offers some of the most breathtaking scenes, but the extreme cold and physical intensity make photography challenging. Preparing your approach in advance ensures that every image can be captured safely and efficiently.
Studying the route the night before helps you identify where the best angles may appear, such as the final slopes, panoramic ridge lines, or sunrise views behind distant mountain ranges. Keeping your camera ready allows you to take quick shots between steps without exposing your hands to freezing wind for too long.
Summit photography often involves balancing the need for safety with creative goals. Prioritizing essential shots means you won’t waste energy trying to improvise at altitude. With planned positions and settings in mind, your photos will be both stunning and strategically taken.
Keep Your Camera Accessible During the Ascent
Carrying your camera in a chest bag or easily reachable pouch prevents you from stopping for long periods. Quick access keeps your rhythm steady while still allowing you to capture key moments.
Plan Sunrise and Panorama Shots
Understand what direction the sun will rise from and position yourself early. Panoramic shots benefit from shooting before the light becomes too intense.
Recommended Camera Settings for Different Mera Peak Conditions
| Scenario | ISO | Shutter Speed | Aperture | Notes |
| Bright snow under clear sky | 100 to 200 | 1/500 or faster | f/8 to f/11 | Maintains detail and prevents overexposure |
| Cloudy or diffused light | 200 to 400 | 1/250 | f/5.6 to f/8 | Softens shadows and highlights scenic shapes |
| Early morning ascent | 400 to 800 | 1/200 to 1/400 | f/4 to f/5.6 | Preserves clarity during low light |
| Action shots of climbers | 200 to 400 | 1/1000 or faster | f/4 to f/8 | Freezes movement cleanly |
Useful Gear Checklist for High-Altitude Photography
| Gear Item | Purpose | Recommended Usage |
| Spare batteries | Prevent power loss | Keep insulated and rotate during the day |
| Wide-angle lens | Capture landscapes | Use for panoramas and summit shots |
| Telephoto lens | Frame distant peaks | Ideal for isolating ridges or small details |
| Protective filters | Shield lenses | Use throughout the climb for safety |
Conclusion
Capturing the best photos on the Mera Peak climb requires thoughtful preparation, precise technical adjustments, and an understanding of mountain environments. By organizing your gear carefully, monitoring power systems, positioning yourself strategically, adapting to changing light, and planning summit-day shots with intention, you can create powerful images that reflect the true beauty and scale of the Himalayas. Whether you are documenting your own journey or photographing others along the trail, these methods help you achieve professional-quality results at altitude.
Explore more insightful and valuable content on our blog journalingtechniques! Stay updated with helpful tips, expert advice, and in-depth articles that enhance your knowledge.
FAQ’s
Keep batteries warm by storing them inside your clothing and rotate them regularly to maintain charge.
A wide-angle lens between 14 and 24 mm captures expansive views and panoramic Himalayan vistas.
Use manual exposure or exposure compensation to balance brightness while keeping snow texture visible.
Yes, but always prioritize safety. Keep your camera accessible and take quick shots during stable moments.
Early morning offers soft, warm light that enhances peak visibility and creates dramatic contrasts.
Yes, RAW provides greater flexibility for adjusting highlights, shadows, and color after the trek.