


Keeping your car seats clean is more than just about looks it’s about hygiene, comfort, and preserving your vehicle’s long-term value. Over time, seats accumulate grime from spills, sweat, food, and dust. These not only make your car’s interior look worn out but can also create unpleasant odors and bacteria buildup. Knowing how to clean car seats the right way helps you maintain a healthy cabin environment, protects your upholstery from premature damage, and gives your car that new and fresh feeling again. Whether your seats are leather, fabric, or vinyl, this complete guide walks you through every stage of cleaning, conditioning, and maintenance so you can achieve professional results right at home.
Gather the Essential Cleaning Materials

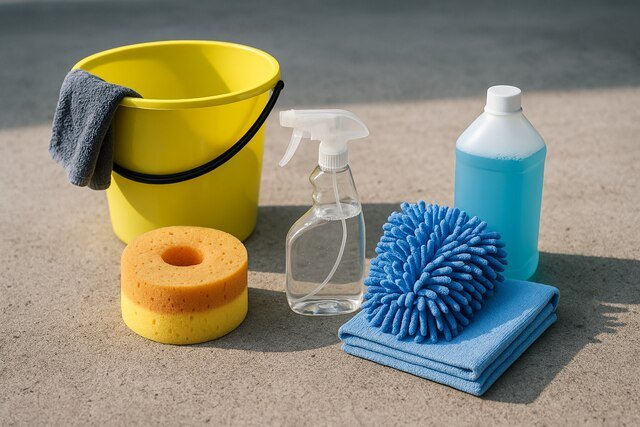
Before starting, it’s crucial to gather all the necessary cleaning materials. The right tools and solutions not only make cleaning easier but also prevent potential damage to your upholstery. Using the wrong product like harsh bleach or a rough brush could discolor or weaken your car seat material, especially on delicate leather or suede surfaces.
For most car interiors, you’ll need a combination of soft tools and gentle cleaning solutions. Microfiber towels are ideal because they lift dirt effectively without scratching. A soft-bristle upholstery brush helps agitate grime from fabric surfaces, while a vacuum with various attachments can reach deep into seams and crevices. Having everything ready before you start ensures a smooth, uninterrupted cleaning session.
If you’re unsure about which cleaning agents are safe for your particular seat material, refer to your car’s manual or do a spot test on a hidden area. Some cleaners can react with synthetic coatings or dyes, causing discoloration or stiffness. Choosing material-specific products keeps your seats looking and feeling their best for years.
Choose the Right Cleaning Agents
Leather seats require pH-balanced cleaners that preserve natural oils and prevent drying. For fabric seats, foam-based or enzyme-rich cleaners work best because they break down organic stains like coffee or food spills. Vinyl or plastic-based materials should be cleaned with mild soap and water to avoid cracking or fading.
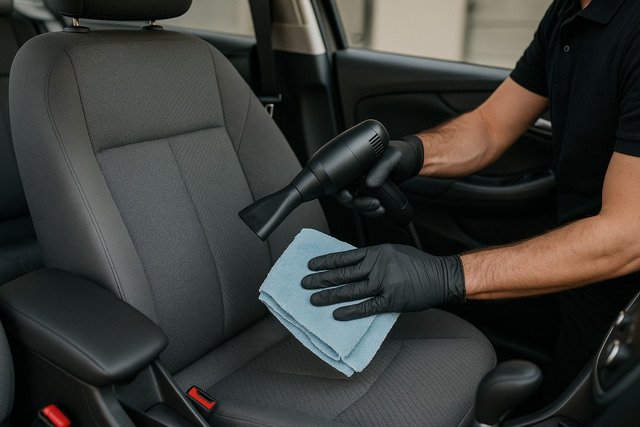
Prepare Cleaning Tools
Equip yourself with a vacuum cleaner (preferably with a crevice attachment), microfiber cloths, a soft sponge, and an upholstery brush. You may also need a spray bottle for homemade solutions, a small bucket for mixing, and protective gloves. Having these tools on hand will make the entire process more efficient and effective.
| Seat Material | Recommended Cleaner | Cleaning Tool | Cleaning Frequency |
| Leather | pH-balanced leather cleaner | Microfiber towel | Monthly |
| Fabric | Foam or enzyme-based cleaner | Upholstery brush | Every 2–3 weeks |
| Vinyl | Mild soap + water mix | Soft sponge | Monthly |
| Suede | Suede-specific cleaner | Soft brush | Monthly |
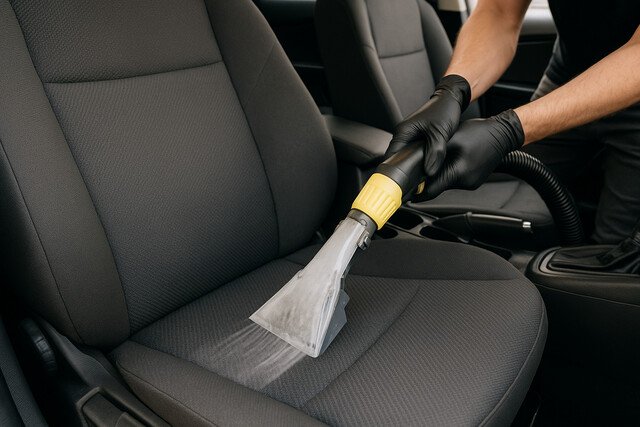
Vacuum and Pre-Treat the Seats
Vacuuming is the first and most essential step in car seat cleaning. It removes dust, sand, crumbs, and other debris that could scratch or damage the fabric during scrubbing. Start by vacuuming the seat surface and then move into the seams, stitching lines, and corners where dirt tends to accumulate. A handheld vacuum or an attachment with a narrow nozzle works best for this.
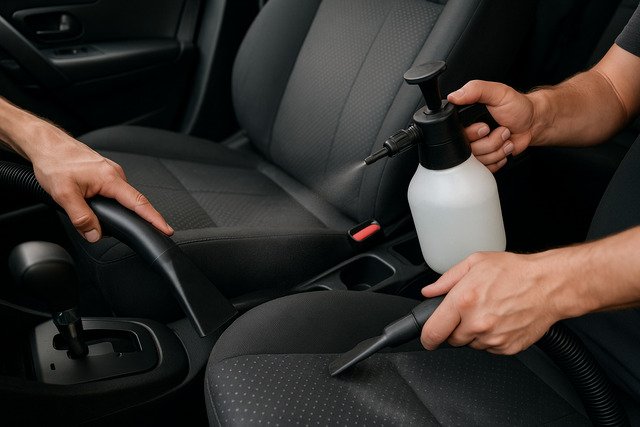
Once the surface is clean, assess the seats for visible stains or areas with discoloration. Pre-treating these stains before the main wash helps break them down more effectively. Use a targeted cleaner for specific stains such as enzyme-based for food spills or vinegar mixtures for coffee stains. Gently spray the solution, let it sit for a few minutes, and then blot with a clean towel. Avoid soaking the area, as excess moisture can lead to mildew or odors later.
This step ensures your main cleaning process is smoother and more effective. When seats are pre-treated properly, you need less scrubbing and cleaning solution later, which reduces the risk of wear or water spots.
Identify and Treat Stains Early
Different stains require different solutions. For instance, greasy stains may need baking soda to absorb oil, while ink can often be lifted with rubbing alcohol or specialized ink removers. By identifying stains early, you can use targeted treatments rather than generic cleaners that may not work effectively.
Let Pre-Treaters Settle
Allow the stain remover to dwell for 10–15 minutes before wiping. This gives it time to break down stubborn residues. Blot the area gently afterward to avoid spreading the stain deeper into the material.
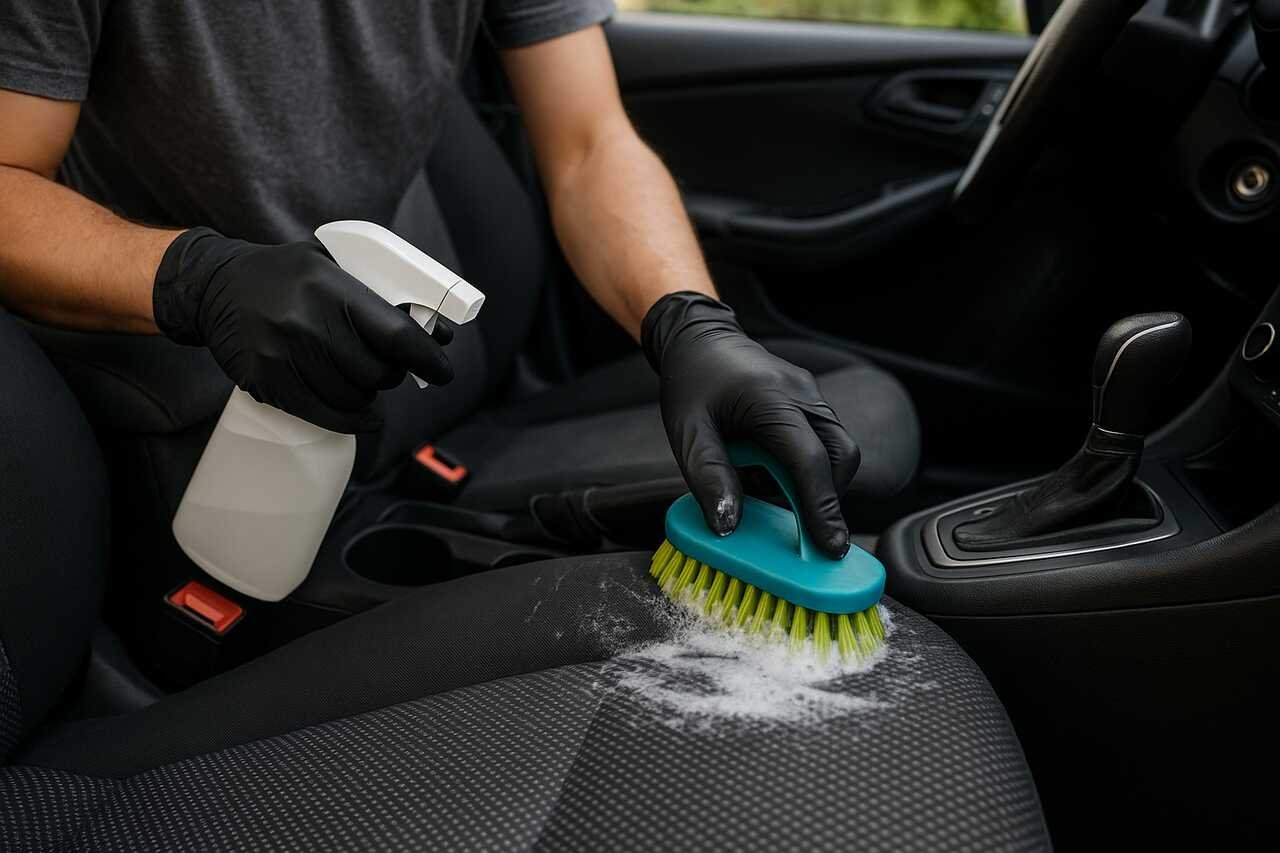
Deep Clean Fabric Car Seats
Fabric seats are comfortable but also the most susceptible to dirt and odors. They absorb liquids quickly and can trap dust and bacteria within the fibers. Deep cleaning helps restore their freshness and eliminate trapped grime.
To clean fabric seats, start by spraying a small amount of upholstery cleaner onto a section of the seat. Using a soft brush, scrub the area in circular motions to loosen dirt. Work in small sections to ensure even cleaning. After scrubbing, wipe away excess foam or residue with a damp microfiber towel. Avoid soaking the fabric to prevent mold growth.
Once cleaning is complete, allow the seats to dry fully before use. Open the windows or doors to improve airflow. If possible, park your car in a shaded, breezy area to speed up drying while avoiding direct sunlight, which can fade colors.
Use Steam Cleaners for Fabric Restoration
A steam cleaner is excellent for lifting deep-seated dirt and sanitizing the material. The steam penetrates fibers, killing germs and dissolving grime without requiring harsh chemicals. Move the steamer slowly and evenly across the seat to achieve the best results.
Deodorize with Natural Solutions
To remove lingering odors, sprinkle baking soda across the seat surface, optionally mixing it with a few drops of your favorite essential oil. Leave it for about 15 minutes, then vacuum it off. This simple remedy neutralizes unpleasant smells and leaves a clean, fresh scent.
Clean and Condition Leather Car Seats
Leather car seats exude luxury and comfort but require extra care to maintain their appearance. Dust, body oils, and sunlight can cause them to lose their sheen and develop cracks if not cleaned regularly. Begin by vacuuming to remove surface debris and prevent scratches during cleaning.
Apply a leather cleaner using a soft, damp microfiber cloth, gently rubbing in circular motions. This method removes grime without stripping the natural oils. After cleaning, follow up with a high-quality leather conditioner. Conditioning restores moisture, enhances flexibility, and protects against UV damage.
It’s best to clean and condition leather seats every month, especially if your car is often parked outdoors. Consistent care helps prevent fading, cracking, and dullness while preserving the seat’s natural texture.
Apply Leather Conditioner Evenly
After cleaning, use a small amount of conditioner on a microfiber cloth and work it evenly across the surface. Let it sit for 10–15 minutes to absorb, then buff gently with a dry towel to enhance shine.
Protect Leather from Sun Damage
Prolonged exposure to sunlight can cause leather to fade and crack. Use window shades, UV-protectant sprays, or seat covers when parking for extended periods. This simple precaution maintains the seat’s suppleness and color vibrancy.
| Leather Type | Cleaning Product | Recommended Frequency | Conditioning Needed |
| Genuine Leather | pH-balanced leather cleaner | Monthly | Yes |
| Synthetic Leather | Mild soap + water | Monthly | No |
| Nappa Leather | Specialized cleaner | Every 2 weeks | Yes |
| Perforated Leather | Foam-based cleaner | Monthly | Yes |
Refresh Vinyl and Synthetic Seats
Vinyl and synthetic seats are easier to maintain than fabric or leather, but they can still lose their luster over time. They resist water well but are prone to cracking if neglected. Start by wiping the seats with a damp cloth to remove dust. Then apply a vinyl-safe cleaner or a mixture of mild soap and warm water.
Use a soft sponge or cloth to gently scrub, focusing on seams and creases where dirt collects. Rinse off any residue with a damp towel and dry the surface thoroughly. Once clean, apply a vinyl protectant to restore shine and guard against UV rays.
Consistent care prevents vinyl from becoming brittle, sticky, or dull. Avoid harsh solvents or silicone-based products that can cause long-term damage.
Prevent Stickiness on Vinyl Surfaces
Vinyl surfaces can feel sticky if low-quality protectants are used. Opt for silicone-free protectants that leave a dry, smooth finish and don’t attract dust or dirt.
Use Gentle Circular Motions
When scrubbing, always use gentle circular movements. This ensures dirt lifts evenly while preserving the smooth surface of vinyl. Overly aggressive cleaning may cause small cracks or abrasions.
Remove Odors and Bacteria Effectively
Even after visible dirt is gone, bad odors may linger in your car seats. These odors are often caused by bacteria, mold, or spilled food trapped deep within the fabric or foam. Eliminating them requires thorough deodorizing and sanitization.
Start by spraying an enzyme-based cleaner that targets organic residues. These cleaners neutralize bacteria instead of just masking smells. For a natural approach, mix equal parts of white vinegar and water in a spray bottle and lightly mist the seats, then let them air dry.
Activated charcoal bags can also be placed under seats to absorb unpleasant odors continuously. Maintaining odor control keeps your car interior smelling pleasant and ensures a healthier environment for everyone.
Use Enzyme Cleaners for Deep Sanitization
Enzyme cleaners break down odor-causing bacteria at the molecular level. They’re particularly effective for removing smells caused by pets, sweat, or food spills.
Air Out the Vehicle After Cleaning
After applying odor removers, open the doors and windows to allow fresh air circulation. Proper ventilation ensures that moisture evaporates quickly and the cleaning scent dissipates naturally.
Maintain Seat Cleanliness Regularly
Cleaning your car seats isn’t just a one-time task it’s an ongoing maintenance routine. Regular upkeep prevents dirt from embedding deep into the fabric and reduces the effort required for future cleanings.
Vacuuming once a week and addressing stains immediately can make a huge difference. Plan a full deep-cleaning session every two to three months, depending on how often you use your car. Keeping up with maintenance not only improves appearance but also extends the lifespan of your upholstery.
By adopting these habits, your seats remain vibrant, comfortable, and odor-free, providing a pleasant driving experience every time.
Establish a Cleaning Routine
Mark your calendar for periodic maintenance. Include quick vacuuming, wiping down surfaces, and checking for stains weekly. This proactive approach keeps grime under control.
Use Seat Covers and Protectants
Seat covers are excellent for preventing spills, pet hair, and UV exposure. They’re also easier to wash and replace than your car’s original upholstery.
Dry and Inspect Seats After Cleaning
Proper drying is the final but most crucial step of car seat cleaning. Any leftover moisture can lead to mold growth or unpleasant odors. Use absorbent microfiber towels to remove excess water, then allow the seats to air dry completely before sitting or reinstalling seat covers.
If you live in a humid area, use fans or a car air blower to accelerate drying. Avoid direct sunlight for delicate materials like leather, as it can cause fading or warping. Once dry, inspect each seat carefully for spots you might have missed.
Performing a post-cleaning inspection ensures that stains are fully removed and your car interior looks flawless.
Use Fans for Faster Drying
A portable fan or car blower can help circulate air and speed up the drying process. Keeping windows slightly open also helps prevent condensation.
Inspect Stitching and Seams
Look closely at the stitching, seams, and corners. If you notice any fraying or damage, consider getting them repaired to prevent future tearing or discoloration.
Conclusion
Learning how to clean car seats properly is a valuable skill that keeps your vehicle in top condition. Whether your seats are leather, vinyl, or fabric, using the right products and techniques will help you remove stains, eliminate odors, and extend their life span. Consistent maintenance from vacuuming and conditioning to deodorizing enhances both comfort and resale value. A clean interior also creates a healthier, more enjoyable driving environment.
With these detailed steps, you can confidently keep your car seats spotless, soft, and inviting every time you get behind the wheel.
Explore more insightful and valuable content on our blog journalingtechniques! Stay updated with helpful tips, expert advice, and in-depth articles that enhance your knowledge.
FAQ’s
For optimal hygiene and appearance, light cleanings should be done every two weeks, while deep cleaning can be performed every two to three months.
No. Most household cleaners contain harsh chemicals that can damage fabric fibers or remove protective coatings from leather. Always use automotive-approved products.
Blot the spill immediately, then mix one part white vinegar with two parts water and a small amount of dish soap. Apply, scrub gently, and rinse with a damp cloth.
Ensure the seats are completely dry before closing windows or using the car. Use fans or open the doors for at least 30–40 minutes after cleaning.
Yes. Sprinkle baking soda evenly on the seat surface, let it sit for 15–20 minutes, then vacuum thoroughly. It neutralizes unpleasant smells effectively.
No. Steam can damage leather by drying out its natural oils. Stick to gentle leather cleaners and conditioners instead.


