


Disconnecting a car battery is a fundamental skill that every car owner should understand. Whether you are replacing an old battery, cleaning corroded terminals, or working on electrical repairs, knowing how to disconnect a car battery properly ensures both your safety and the longevity of your vehicle’s electrical system. A car battery stores a large amount of electrical energy, and mishandling it can result in short circuits, sparks, or even injury. This detailed guide explains the correct procedure, tools required, precautions to take, and the reasoning behind each step so you can work confidently and avoid costly mistakes.
Prepare Your Vehicle and Workspace

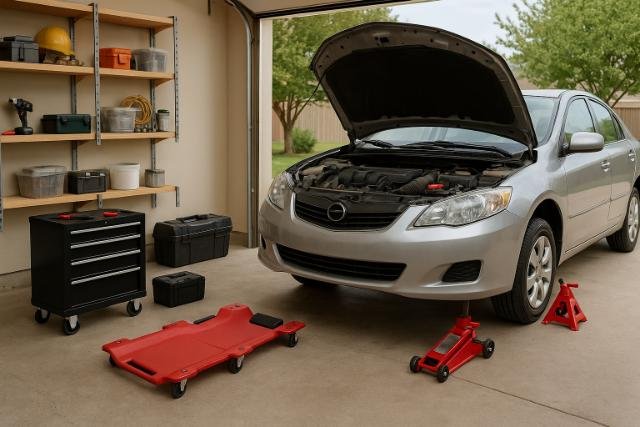
Before attempting to disconnect your car battery, preparation is the foundation of safety. Begin by parking your car on a flat surface, ideally in a well-ventilated area such as a driveway or garage with open doors.
Engage the parking brake to keep the vehicle stable and prevent any accidental movement. Ensure that the engine is completely off and that the keys are removed from the ignition.
Open the hood by pulling the hood release lever inside your vehicle and prop it securely using the support rod. Locate the battery compartment. In most vehicles, the battery sits near the front of the engine bay, but some models, especially European or hybrid cars, may place the battery in the trunk or under a seat. Take a moment to familiarize yourself with your car’s battery location and layout before proceeding.
Gather Essential Tools and Safety Gear
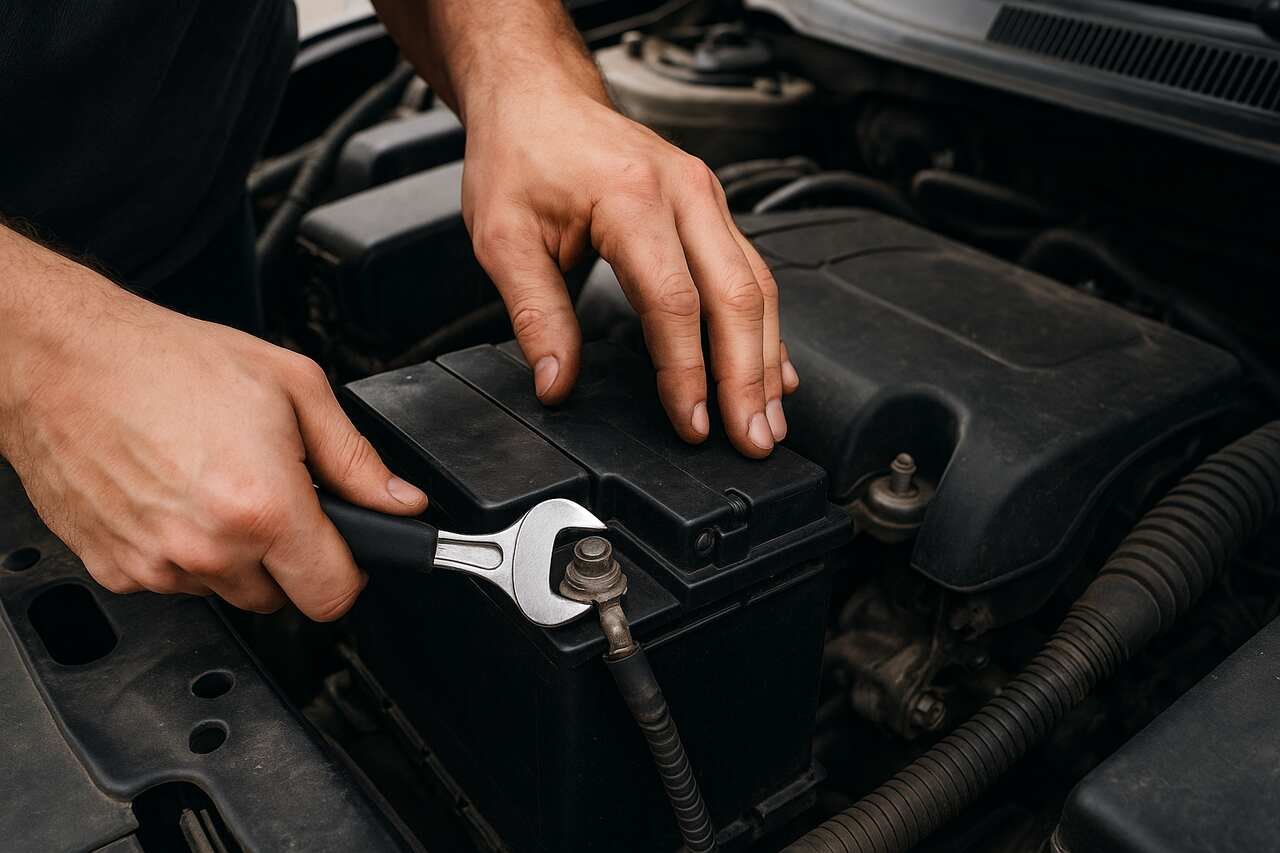
You will need a few tools and safety items to disconnect the battery correctly. The most common sizes of wrench or socket needed are 8mm or 10mm, which fit most battery terminal bolts. Always wear safety gloves and protective eyewear to protect yourself from battery acid or corrosion particles. Since car batteries contain sulfuric acid, accidental splashes or contact with your skin can be harmful.
It is also wise to remove any metal jewelry, such as rings, bracelets, or watches, before beginning work. Metal objects can easily conduct electricity if they touch the terminals, leading to sparks or burns. Keep a clean rag, a small wire brush, and possibly some baking soda and water nearby for cleaning corrosion if needed.
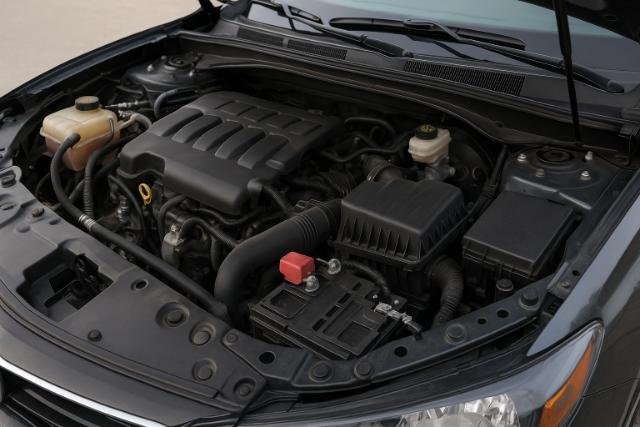
Identify the Battery Terminals
Every car battery has two terminals. The positive terminal is typically marked with a plus (+) sign and has a red cover or cable. The negative terminal is marked with a minus (–) sign and often has a black cover or cable. It is absolutely essential to identify these correctly because the order in which you disconnect and reconnect them affects the safety of the process. Mistaking the terminals or working in the wrong sequence could cause a short circuit that may damage your vehicle’s electrical system or produce dangerous sparks.
Turn Off All Electrical Systems
Once your workspace and tools are ready, ensure that every electrical component in your car is turned off. This includes the headlights, air conditioning, radio, dashboard lights, and any charging devices connected to the USB ports or power sockets.
When electrical components remain active, they draw current from the battery. Disconnecting a live circuit can lead to arcing or sudden surges that could damage sensitive electronics. Turning everything off ensures there is no current flowing through the system, which makes the process safe and stable.
Confirm Ignition and Key Position
Double-check that the ignition key is completely removed from the ignition switch. In vehicles with push-start systems, ensure the start button is in the off position and all lights on the dashboard are off. Some modern vehicles continue to power certain systems for a few minutes after the engine shuts down. Wait about two to five minutes before working on the battery so that all circuits have fully powered down. This delay allows the onboard computer systems to enter a safe idle state.
Disconnect Auxiliary Power Devices
Before disconnecting the terminals, unplug any external devices such as phone chargers, GPS units, OBD-II scanners, or dash cams. These accessories can act as parasitic drains and might cause small sparks or voltage fluctuations when the battery is disconnected. Removing them beforehand ensures there are no stray electrical connections interfering with your task.
Disconnect the Negative Terminal First
The most critical rule when learning how to disconnect a car battery is to always remove the negative terminal first. Doing so breaks the circuit between the battery and the car’s chassis ground, which greatly reduces the risk of short circuits or accidental sparks.
Using the appropriately sized wrench, turn the nut on the negative terminal counterclockwise until it loosens enough to remove the clamp. Once the clamp is loose, gently lift it from the battery post. Do not force it off if it feels stuck; instead, twist it slightly back and forth while pulling upward.
Understand the Safety Logic
When the negative terminal is disconnected, the car’s chassis is no longer part of the electrical circuit. This means that even if your wrench touches another metal component while working on the positive terminal later, there will be no flow of current. This step is what prevents accidental arcing and electrical damage. Many beginners overlook this logic and disconnect the positive terminal first, which can be dangerous because the entire metal body of the car acts as a ground connection.
Insulate the Removed Terminal
Once you remove the negative clamp, cover it immediately with a clean rag, rubber cap, or any non-conductive material. Tuck the cable safely to the side, away from the battery, to prevent it from touching the terminal again accidentally. Even a brief contact can re-establish the connection and cause sparks if you are still working on the positive side.
Disconnect the Positive Terminal
After ensuring the negative side is safely isolated, proceed to the positive terminal. Using the same method, loosen the nut on the positive terminal with your wrench or socket. Once loosened, gently lift the clamp off the post. Be careful not to let the wrench or the cable come into contact with any grounded metal part of the car, as the positive terminal still carries a potential charge until removed.
Handle with Care
While handling the positive terminal, avoid excessive force or jerky movements. The connection is often tighter due to slight corrosion buildup, but forcing it can damage the battery post. A small twisting motion while pulling up is generally enough to remove the terminal safely. Remember, gentle handling preserves both the terminal and the cable integrity.
Protect the Terminal from Contact
After removing the positive clamp, cover it with a rag or plastic cap. Keeping both clamps insulated ensures that no accidental contact occurs during the rest of the process. In engine bays where space is limited, this step is especially important because stray contact between a live terminal and a metal surface could result in sparks or shorting.
Remove the Battery from the Vehicle (If Needed)
If your purpose is to replace, recharge, or clean the battery, the next step is to remove it completely. Car batteries are heavy, weighing between 30 to 50 pounds depending on size and type. To avoid injury, use both hands or a battery carrier strap to lift it carefully.
Loosen the Battery Hold-Down Clamp
Most vehicles have a hold-down clamp or bracket at the base of the battery to keep it secure during driving. Locate this clamp and use your wrench to remove the bolts or nuts holding it in place. Keep these bolts in a small container or magnetic tray to avoid losing them. Once the hold-down is free, you can lift the battery straight up and out of the tray.
Lift the Battery Safely
When lifting the battery, maintain a straight posture and use your knees rather than your back to lift. Keep the battery level to prevent spillage, especially with older lead-acid batteries that contain liquid electrolyte. Place the battery on a dry, flat surface, away from direct heat or sunlight. Never tip the battery sideways or upside down as it can leak acid, which can corrode nearby components.
Clean the Terminals and Battery Tray
Cleaning the battery terminals is an important maintenance step that improves electrical conductivity and ensures longer battery life. Corrosion appears as a white, blue, or greenish powder around the terminals and is caused by chemical reactions between the metal and battery acid vapors.
Remove Corrosion from Terminals
Mix a solution of baking soda and water to neutralize the acidic buildup. Dip a small brush or toothbrush into the mixture and scrub the terminals, cable clamps, and surrounding area. Rinse thoroughly with clean water and dry with a cloth. For stubborn corrosion, a terminal cleaning brush or sandpaper can be used. Keeping terminals clean ensures efficient current flow between the battery and your vehicle’s electrical system.
Inspect the Battery Tray and Cables
Examine the battery tray for any signs of rust, cracks, or acid residue. If corrosion has spread to the tray, clean it with the same baking soda solution and dry completely. Check the cables for any fraying, stiffness, or melted insulation. Damaged cables should be replaced immediately to prevent voltage drops and connection issues. Applying a thin coat of petroleum jelly or dielectric grease to the terminals after cleaning helps protect them from future corrosion.
Common Causes of Battery Corrosion and Their Solutions
| Cause | Description | Recommended Solution |
| Electrolyte leakage | Acid seeping through battery seals | Replace or reseal the battery |
| Moisture exposure | Condensation causing oxidation | Keep vehicle stored in dry conditions |
| Loose connections | Vibration causing wear and corrosion | Tighten terminal clamps properly |
| Overcharging | Excess voltage generating vapors | Inspect alternator for voltage output issues |
Reconnect and Test the Battery (If Reinstalling)
After cleaning and inspection, you may now reinstall the same battery or install a new one. Reconnecting the battery follows the reverse order of disconnection. This means connecting the positive terminal first and the negative terminal last. Doing so re-establishes the electrical circuit safely.
Secure the Battery Properly
Place the battery into the tray, making sure it sits firmly and level. Reattach the hold-down clamp or bracket to secure it. Tighten the bolts just enough to keep the battery stable without cracking the casing. A loose battery can move during driving, potentially loosening the terminals or damaging nearby parts.
Verify Power Restoration
Reconnect the positive cable first, tighten the nut, and then connect the negative cable. Ensure that both clamps are snug and have no movement. Once everything is secure, test the vehicle by turning on the ignition. Check that the lights, radio, and other electrical functions operate normally. If the car fails to start, double-check your connections for tightness or corrosion.
Recommended Battery Reconnection Order and Purpose
| Step | Terminal | Purpose |
| 1 | Connect Positive (+) | Restores power flow to vehicle systems |
| 2 | Connect Negative (–) | Completes the electrical circuit |
| 3 | Tighten Both Clamps | Prevents voltage drops or loose connections |
| 4 | Test Vehicle Systems | Confirms successful battery installation |
Conclusion
Understanding how to disconnect a car battery is a vital part of responsible vehicle maintenance. It allows you to replace your battery safely, clean corrosion, and perform repairs on electrical systems without risking damage. By following the correct sequence disconnecting the negative terminal first and reconnecting it last you maintain safety and prevent electrical accidents. Always work with care, use proper tools, wear protective gear, and double-check all connections before starting your vehicle. A few careful minutes can protect your car’s electronics and extend the lifespan of your battery.
Explore more insightful and valuable content on our blog journalingtechniques! Stay updated with helpful tips, expert advice, and in-depth articles that enhance your knowledge.
FAQ’s
No, you should never disconnect the positive terminal first. Doing so can cause a short circuit because the car’s chassis is grounded. Always remove the negative terminal first for safety.
Wait around 5 to 10 minutes after disconnecting the battery to allow all vehicle electronics to reset. This ensures the car’s electrical modules are fully powered down.
Yes, disconnecting the battery will reset the ECU or Engine Control Unit. This may clear fault codes, reset radio presets, and erase adaptive memory, so be prepared to reconfigure your settings afterward.
Touching both terminals simultaneously can create a short circuit and cause sparks or burns. Always use insulated tools and handle the terminals one at a time.
Never disconnect the battery while the engine is on. The alternator relies on the battery to stabilize voltage. Removing it can cause sudden voltage spikes that damage the electrical system.
Inspect and clean the terminals at least twice a year, especially before winter or before long trips. Regular cleaning helps maintain a strong and reliable electrical connection.


