


Highlights
- MX Master supports precision work through adjustable DPI, MagSpeed scrolling, and surface adaptive tracking
- Multi device pairing allows seamless switching between up to three computers without reconnecting
- Logitech Options Plus unlocks advanced customization for buttons, gestures, scrolling, and app specific profiles
- MagSpeed scroll wheel enables both precise line by line control and rapid free spin navigation
- Custom button mapping reduces keyboard dependency and speeds up repetitive tasks
- Application specific profiles adapt controls automatically for design, coding, browsing, and office work
- Logitech Flow enables cross computer cursor movement, clipboard sharing, and file transfer
- Long battery life with quick charging supports uninterrupted professional workflows
- Ergonomic shape and thumb rest reduce strain during long working sessions
- Firmware updates improve stability, tracking accuracy, and connectivity over time
Introduction
The MX Master series has become a reference point for professionals who rely on precision, comfort, and multi device efficiency in daily work. Designers, developers, analysts, editors, and remote workers use MX Master to reduce friction between tasks, screens, and applications. This guide explains how to set up, configure, and optimize MX Master for sustained productivity. Each step focuses on practical actions that improve control, accuracy, and workflow speed across operating systems and work environments.
Unbox and Inspect the MX Master Hardware

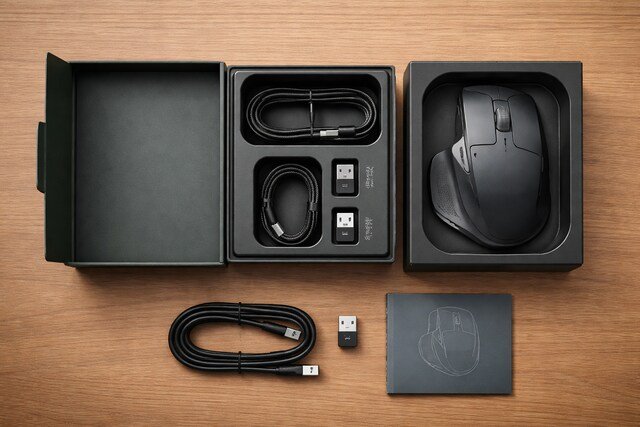
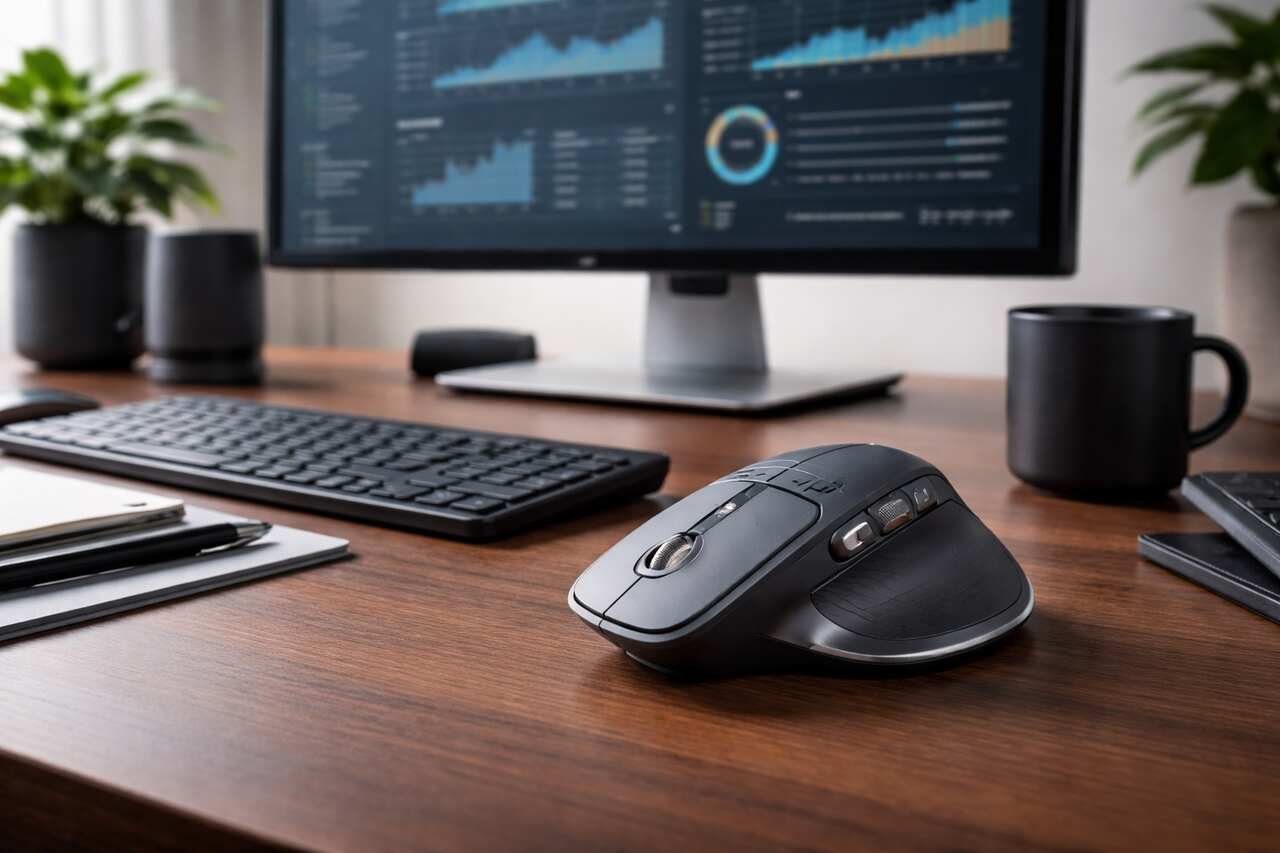
Start by unboxing the MX Master and verifying all physical components before setup. The mouse body, USB receiver, charging cable, and documentation must be present to ensure full functionality. The mouse shell uses a sculpted right hand design that supports palm and claw grips, while the thumb rest stabilizes lateral movement during long sessions.
Check the main scroll wheel, thumb wheel, side buttons, gesture button, and DPI button for tactile response. These controls form the foundation of productivity features later configured in software. Inspect the sensor window and feet for debris or damage because tracking accuracy depends on clean optical surfaces.
MX Master hardware supports multiple connection modes and long battery life. Confirm the power switch location on the underside and note the Easy Switch button used to toggle between paired devices. This inspection step prevents setup delays and ensures the mouse performs as designed.
Charge the MX Master Battery Before Configuration
Charge the MX Master fully before pairing and customization. A full charge stabilizes firmware behavior and prevents interruptions during configuration. Connect the included USB C cable to a power source and the mouse charging port. The LED indicator signals charging status and completion.
Battery capacity supports weeks of usage on a single charge, depending on polling rate and usage intensity. Charging also activates quick charge functionality, where a short charge provides several hours of use. This feature is valuable for mobile professionals and travel scenarios.
Charging before setup ensures uninterrupted firmware updates and software recognition. Stable power improves Bluetooth pairing reliability and prevents partial configuration states that occur when devices power down mid process.
Connect MX Master Using Bluetooth or USB Receiver

Pair the MX Master using the connection method that best matches your workflow. Bluetooth provides native connectivity for laptops, tablets, and systems with limited ports. The USB receiver offers lower latency and consistent performance for desktop environments.
To connect via Bluetooth, power on the mouse and press the Easy Switch button until the channel indicator flashes. Select the mouse from your operating system’s Bluetooth menu and confirm pairing. For USB receiver pairing, insert the receiver into a USB port and power on the mouse. The connection establishes automatically on the default channel.
MX Master supports up to three paired devices. This multi device capability allows seamless switching between computers, which benefits users managing workstations, laptops, and tablets simultaneously.
Install Logitech Options Plus Software
Install Logitech Options Plus to unlock the full MX Master feature set. Download the software from the official website and complete installation for your operating system. The software detects the mouse automatically and prompts for permissions required for advanced customization.
Options Plus serves as the control center for button mapping, pointer speed, scrolling behavior, and application specific profiles. The interface displays a visual representation of the mouse, making configuration intuitive and precise.
Keeping the software updated ensures compatibility with operating system updates and introduces new features. Software installation transforms MX Master from a standard pointing device into a configurable productivity tool.
Update Firmware for Stability and Performance
Check for firmware updates immediately after software installation. Firmware updates improve sensor accuracy, scrolling algorithms, Bluetooth stability, and battery efficiency. Access firmware updates through Logitech Options Plus and follow on screen instructions.
Do not disconnect or power off the mouse during the update process. Firmware updates take several minutes and require stable power and connectivity. Once completed, restart the mouse to apply changes.
Updated firmware ensures optimal performance across surfaces and applications. It also resolves known issues and enhances compatibility with newer operating systems and hardware platforms.
Customize Pointer Speed and DPI Settings
Adjust pointer speed and DPI to match your screen resolution and task requirements. MX Master supports adjustable DPI levels that control cursor sensitivity. Higher DPI suits large or high resolution displays, while lower DPI improves precision for design and editing tasks.
Use Logitech Options Plus to fine tune pointer speed rather than relying solely on operating system settings. This approach provides granular control and consistent behavior across devices.
Assign the DPI button to toggle between preset sensitivity levels. This allows quick switching between fast navigation and precise control without entering settings menus.
Configure Scroll Wheel and MagSpeed Scrolling
Optimize the main scroll wheel to balance speed and precision. MX Master uses MagSpeed electromagnetic scrolling, which switches between ratchet and free spin modes. Ratchet mode provides tactile steps for controlled scrolling, while free spin enables rapid movement through long documents.
Customize scroll behavior in software by setting scroll direction, speed, and smart shift sensitivity. Smart shift automatically switches modes based on scrolling force.
Configure the thumb wheel separately for horizontal scrolling. This control benefits spreadsheet navigation, video timelines, and wide canvases. Proper scroll configuration reduces wrist movement and accelerates navigation tasks.
Assign Custom Actions to Buttons and Gestures
Map buttons and gestures to actions that reduce repetitive keyboard use. MX Master includes multiple programmable buttons, including side buttons, thumb button, and gesture button. Assign commonly used functions such as copy, paste, undo, redo, and application switching.
The gesture button supports directional gestures combined with mouse movement. Assign gestures to tasks like desktop switching, window snapping, or launching applications. This feature consolidates multiple shortcuts into a single control.
Custom button mapping improves workflow efficiency by reducing context switching. Each assignment should align with frequent actions to maximize time savings.
Create Application Specific Profiles
Set up application specific profiles to tailor MX Master behavior for different software. Logitech Options Plus detects active applications and applies custom configurations automatically. Create separate profiles for design tools, development environments, browsers, and office applications.
For example, assign zoom and pan controls for design software, code navigation shortcuts for development tools, and tab switching for browsers. Each profile maintains independent button mappings and scroll settings.
Application profiles ensure consistent ergonomics across tasks. This approach prevents conflicting shortcuts and optimizes control schemes for specialized workflows.
Enable Flow for Cross Device Control
Activate Logitech Flow to control multiple computers with a single MX Master. Flow allows cursor movement across screens, clipboard sharing, and file transfer between systems on the same network.
Enable Flow in Logitech Options Plus and follow pairing instructions for each device. Ensure all systems are connected to the same network and signed into the same account if required.
Flow enhances multi computer productivity by eliminating manual switching. It supports seamless transitions between workstations, improving focus and reducing hardware clutter.
Optimize MX Master for Different Work Environments
Adapt MX Master settings to different environments such as office desks, home setups, and travel scenarios. Adjust DPI, scroll speed, and button mappings based on desk size and screen arrangement.
Use Bluetooth pairing for mobile devices and USB receiver for fixed workstations. Store the receiver in the mouse body during travel to prevent loss.
Environmental optimization ensures consistent performance regardless of location. This flexibility makes MX Master suitable for hybrid and remote work models.
Maintain MX Master for Long Term Performance
Clean the mouse regularly to maintain tracking accuracy and button responsiveness. Use a soft cloth to wipe the exterior and compressed air to clear debris from sensor and scroll wheel areas.
Monitor battery health by avoiding deep discharge cycles. Recharge the mouse before battery levels drop critically to prolong lifespan.
Keep Logitech Options Plus updated to receive performance improvements. Proper maintenance extends the usability and reliability of MX Master over years of daily use.
Compare MX Master Features Across Use Cases
| Use Case | Key Settings | Primary Benefit |
| Office productivity | Medium DPI, smart scrolling, copy paste buttons | Faster document navigation |
| Design and editing | Low DPI, precise scrolling, zoom gestures | Improved accuracy |
| Development | Application profiles, code navigation buttons | Reduced keyboard dependency |
| Multi device work | Flow enabled, device switching | Seamless system control |
Summary of MX Master Configuration Elements
| Configuration Area | Purpose | Recommended Action |
| Firmware | Stability | Update immediately |
| DPI settings | Cursor control | Match screen resolution |
| Scroll behavior | Navigation | Enable smart shift |
| Button mapping | Efficiency | Assign frequent actions |
| Application profiles | Task optimization | Customize per software |
Conclusion
MX Master delivers its full value when configured intentionally for the user’s workflow. Proper charging, pairing, firmware updates, and software customization transform the mouse into a precision productivity instrument. Button mapping, scroll optimization, application profiles, and multi device control reduce friction across tasks and systems. With consistent maintenance and thoughtful configuration, MX Master supports professional efficiency, comfort, and long term performance in demanding work environments.
Explore more insightful and valuable content on our blog journalingtechniques! Stay updated with helpful tips, expert advice, and in-depth articles that enhance your knowledge.
FAQ’s
MX Master supports up to three paired devices and allows instant switching using the Easy Switch button.
MX Master sensors track on most surfaces, including glass, depending on the specific model and sensor generation.
Basic functionality works without software, but advanced customization and productivity features require Logitech Options Plus.
Yes, the mouse remains fully functional when connected to a charging cable.
MX Master supports both platforms with platform specific customization options available in Logitech Options Plus.
Battery life typically ranges from several weeks to over a month depending on usage patterns and settings.


