


Highlights
- I noticed my iPhone was not charging properly, and instead of replacing the cable, I checked the charging port and realized dust and lint were the real problem.
- Before doing anything, I turned my phone off and placed it under good lighting so I could clearly see what was blocking the connection.
- I avoided metal tools and used simple household items like a wooden toothpick and a soft brush to protect the delicate charging pins.
- Slowly and patiently, I removed compacted lint from the sides of the port without forcing anything or scratching the inside.
- After clearing visible debris, I used short bursts of compressed air to remove fine dust that could not be reached by hand.
- I made sure not to use water, alcohol, or sprays because moisture can cause hidden damage over time.
- Once cleaning was complete, I powered the phone back on and tested it with a reliable charging cable to confirm stable charging.
- The charging connection felt firm again, and the phone started charging instantly, confirming the cleaning worked.
- I learned that if charging issues continue even after careful cleaning, it is best to stop and seek professional repair help.
- This simple cleaning habit saved me time, money, and frustration and helped keep my iPhone working smoothly without unnecessary repairs.
Introduction
Keeping your iPhone charging port clean is one of those small maintenance habits that makes a big difference. I learned this the hard way when my phone stopped charging properly and I assumed the cable was broken. After some careful cleaning, the problem disappeared instantly. In this guide, I will walk you through exactly how to clean an iPhone charging port step by step, using safe methods, simple tools, and personal tips from my own experience so you can avoid costly repairs and charging frustration.
Prepare the iPhone Before Cleaning
Before touching the charging port, preparation is essential. I always start by turning off my iPhone completely to avoid any electrical risk. Powering the device down protects internal components and gives peace of mind while working in such a delicate area. Removing the charging cable and any accessories is also important so nothing interferes with visibility or movement.
Once the phone is off, I like to place it on a flat, well lit surface. Good lighting makes a big difference because you can actually see dust, lint, or debris inside the port. I usually tilt the phone slightly and look directly into the port to assess how dirty it is before doing anything else.
From my experience, skipping this step often leads to rushed cleaning and accidental damage. Taking a minute to prepare helps you stay calm and careful. This is especially important with modern iPhones designed by Apple, where internal components are tightly packed.
Power Down the Device Completely
Turning the phone off prevents short circuits and unexpected behavior. I never clean a charging port while the phone is on, even if I am in a hurry.
A powered down phone also reduces the chance of static interference. This is a small detail, but it adds an extra layer of safety.
Inspect the Charging Port Visually
Looking into the port first helps you understand what you are dealing with. Sometimes it is just pocket lint, other times compacted dust.
This inspection helps you choose the right tool and avoid unnecessary force.
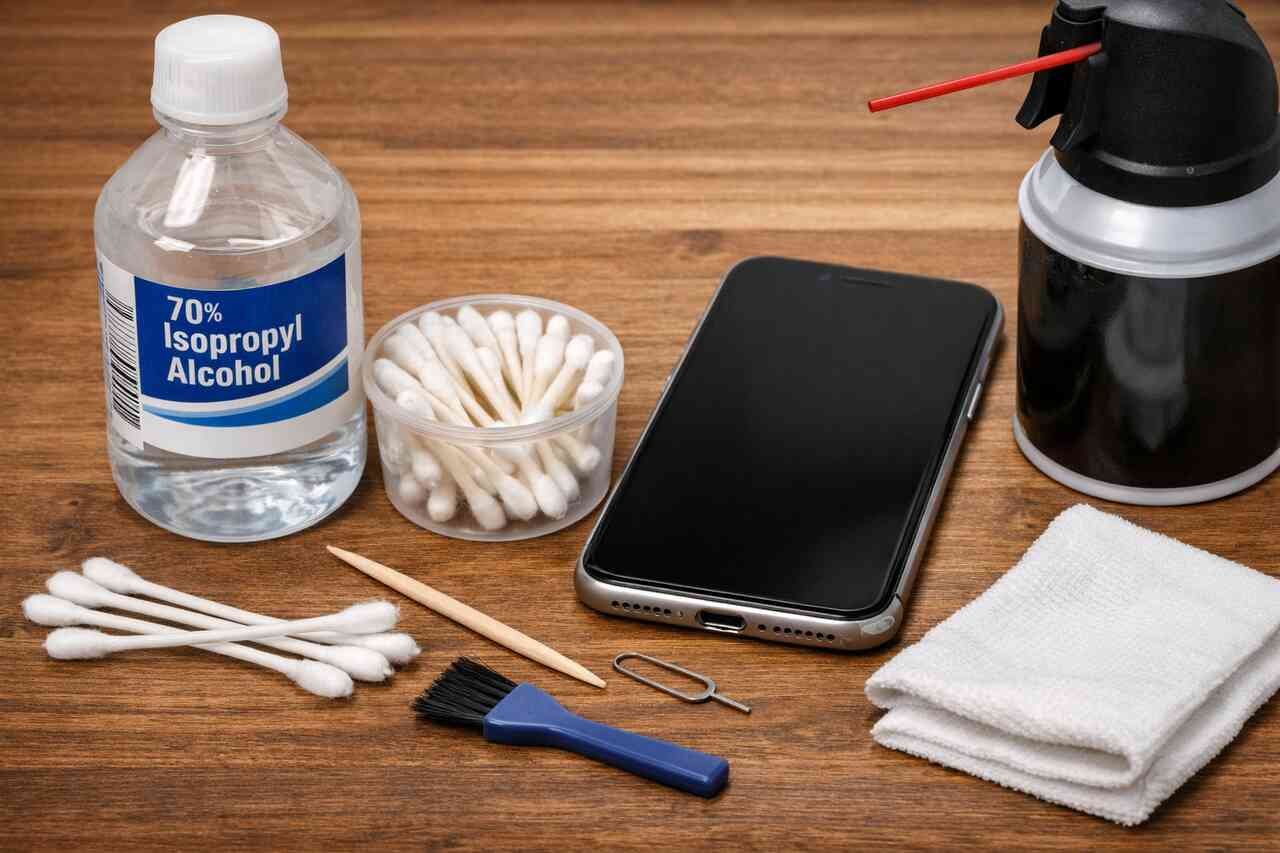
Gather Safe Cleaning Tools at Home

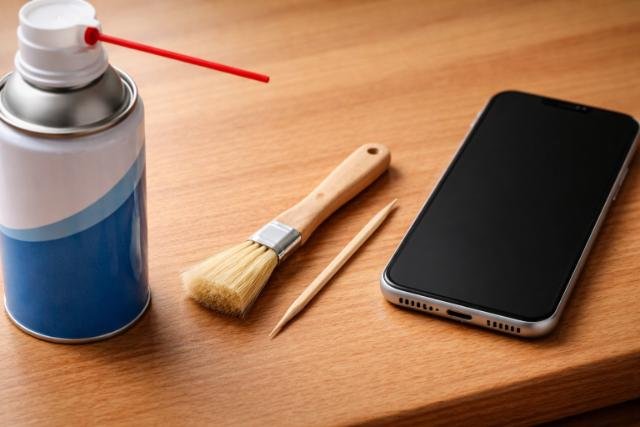
Using the right tools matters more than most people think. I have seen friends damage their charging ports using metal pins or paper clips, and that is something I always warn against. The safest tools are usually already at home and gentle enough for electronics.
I personally use a wooden toothpick, a soft bristle brush, and a can of compressed air if available. These tools allow controlled cleaning without scratching internal connectors. The goal is to remove debris, not scrape the port aggressively.
Based on my experience, less is more. You do not need expensive kits or professional tools. You just need patience and soft materials that do not conduct electricity.
Choose Non Metal Cleaning Tools
Wood and plastic tools are ideal because they reduce the risk of electrical damage. I prefer toothpicks because they are thin and flexible.
Avoid needles, pins, or anything sharp. These can permanently damage the charging contacts.
Keep Liquids and Chemicals Away
I never use water, alcohol, or cleaning sprays directly inside the port. Liquids can seep inside and cause corrosion.
Dry cleaning methods are safer and usually more effective for lint and dust.
Remove Loose Debris Gently
This step is where most of the visible improvement happens. I gently insert a wooden toothpick into the charging port and slowly scrape along the sides. The key is to be extremely gentle and patient, working in small movements.
As I clean, I often notice compacted lint that comes out in small clumps. This lint usually comes from pockets and bags. Removing it slowly prevents pushing debris deeper into the port.
From my own routine, I recommend stopping frequently to check progress. Rushing this step increases the risk of damaging the charging contacts inside the port.
Use a Toothpick With Light Pressure
I apply just enough pressure to lift debris without scraping hard. The motion should feel controlled and slow.
If something does not come out easily, I stop and reposition instead of forcing it.
Work Around the Inner Edges Carefully
Most lint sticks to the sides of the port. I focus on the edges rather than the center.
This approach helps clear space for the charging cable to make proper contact again.
Use Compressed Air to Clear Fine Dust
After removing visible debris, I use compressed air to blow out remaining dust. This step helps clear particles that are too small to grab with a toothpick. I always hold the can upright and use short bursts.
I keep the nozzle slightly away from the port instead of inserting it directly. This prevents moisture or excessive pressure from entering the device.
In my experience, compressed air makes a noticeable difference when charging feels inconsistent even after manual cleaning.
Apply Short Controlled Air Bursts
Short bursts prevent condensation buildup. I never spray continuously into the port.
Controlled airflow removes dust without stressing internal components.
Hold the Phone at a Slight Angle
Tilting the phone helps debris fall out naturally. Gravity works in your favor here.
This simple adjustment improves cleaning results significantly.
Avoid Common Cleaning Mistakes
Over the years, I have made mistakes that taught me valuable lessons. One of the biggest mistakes is using metal objects. Another common error is applying too much force, thinking stubborn lint needs aggressive removal.
People also tend to use liquids thinking it will dissolve dirt. In reality, moisture causes more problems than it solves inside electronic ports.
Learning what not to do is just as important as knowing the right steps. Avoiding these mistakes can extend your iPhone’s lifespan significantly.
Do Not Insert Sharp or Metal Objects
Metal tools can scratch contacts and cause permanent charging issues. I never take this risk.
Even a small scratch can lead to inconsistent charging.
Avoid Sprays, Alcohol, or Water
Liquids can cause internal corrosion and void warranties. Dry methods are always safer.
If moisture enters the phone, damage may not appear immediately but can develop over time.
Test the Charging Port After Cleaning
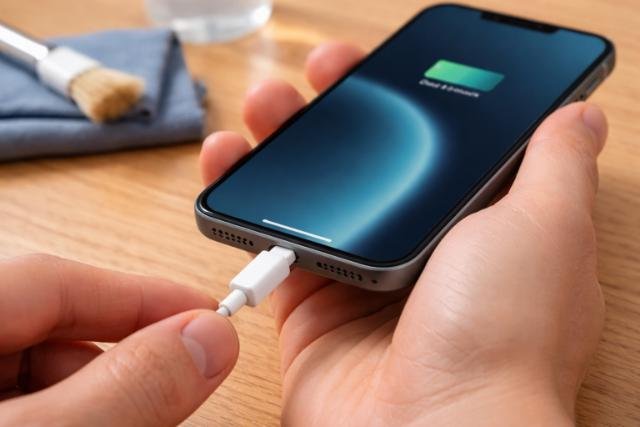
Once cleaning is complete, I power the iPhone back on and test it with a known working cable. This step confirms whether the cleaning was successful. I plug the cable in gently and check if it clicks firmly into place.
I also move the cable slightly to see if charging remains stable. A secure connection usually means the port is clean and making proper contact again.
From my experience, this testing phase is satisfying because you can immediately see the results of careful cleaning.
Plug in a Certified Charging Cable
Using a reliable cable eliminates confusion about whether the issue is the port or the accessory.
I always test with a cable that worked well before.
Check for Stable Charging Connection
A clean port holds the cable securely. If charging drops when moved slightly, more cleaning may be needed.
Stable charging indicates successful debris removal.
Know When Professional Help Is Needed
Sometimes cleaning at home is not enough. I have encountered situations where the charging port still failed to work due to internal damage or bent connectors. Knowing when to stop is important.
If the phone does not charge after careful cleaning, professional inspection is the safest option. Continuing to poke inside the port can worsen the problem.
From personal experience, seeking help early can prevent more expensive repairs later.
Recognize Signs of Internal Damage
Loose ports, visible bent pins, or overheating during charging are warning signs.
These issues require professional tools and expertise.
Visit an Authorized Repair Center
Authorized technicians have proper equipment and training. This ensures safe and accurate repairs.
Professional help protects your device and data.
Conclusion
Cleaning an iPhone charging port is a simple yet powerful way to restore proper charging and extend your phone’s life. By preparing the device, using safe tools, removing debris gently, and avoiding common mistakes, you can solve most charging issues at home. I have used this exact process multiple times, and it has saved me time, money, and frustration. With patience and care, you can keep your iPhone charging reliably without unnecessary repairs.
Explore more insightful and valuable content on our blog journalingtechniques! Stay updated with helpful tips, expert advice, and in-depth articles that enhance your knowledge.
FAQ’s
I recommend checking and lightly cleaning it every few months, especially if you keep your phone in pockets or bags.
Yes, compacted lint is one of the most common reasons for charging issues.
Yes, if used carefully with short bursts and the can held upright.
At that point, professional repair is the safest option.
It can if done incorrectly. Using gentle tools and patience minimizes risk.
Basic cleaning does not, but damage caused by improper methods might.


